Thursday, December 20, 2012

Recipe: Chocolate Amish Friendship Bread

Amish Friendship Bread - Little Wooden Chef
Amish Friendship Bread:

About two weeks ago, I was given a bag of Amish Friendship Bread Starter. For those of you that aren't familiar with Amish Friendship Bread, it is essentially the baking version of a chain letter: you receive a bag of the Friendship Bread Starter, take care of it for ten days, and by the end of the tenth day, it would have multipled by four. You're then left with four one-cup portions of the Friendship Bread Starter. You're supposed to bake one, and give three away to your friends. And so the Amish Friendship Bread "chain" continues, from one friend to the next.

I received my starter from a coworker, but if you want to try this recipe or start an Amish Friendship Bread loop amongst your friends, the starter is easy to make. I would describe the finished, baked product as a cross between a banana bread and sliced bread. It's not quite sweet or moist enough to resemble banana bread, but also not dry or stiff enough to resemble sliced bread. Give this quick and easy Amish Friendship Bread recipe a try!

Amish Friendship Bread Starter 

(makes 1 cup starter)

Ingredients:
1 (0.25 ounce) package active dry yeast
1/4 cup warm water
1 cup all-purpose flour
1 cup white sugar
1 cup milk

1. In a small bowl, dissolve the active dry yeast in the 1/4 cup warm water. Let stand for 10 minutes.
2. In a separate non-reactive container, combine flour and sugar and mix thoroughly.
3. Slowly stir the milk and dissolved yeast in with the flour and sugar mixture.
4. You can either cover the container loosely or pour the mixture into a Ziploc bag. If you use Ziploc bags, make sure to squeeze out the air if/when air gets into the bag.
5. This is Day 1 of the Starter. Store the Amish Friendship Bread Starter at room temperature. At this point, you can either continue with the Chocolate Amish Friendship Bread recipe below, or continue with the 10-day friendship bread cycle. If you continue the cycle, you will end up with four cups of Amish Friendship Bread Starter at the end of the ten days.

To continue the Amish Friendship Bread Starter:

Ingredients:
2 cups all-purpose flour
2 cups white sugar
2 cups milk

 
6. Days 2 - 5: If your starter is in a bowl, stir the starter with a spoon once a day from days two through five. If your friendship bread starter is in a Ziploc bag, simply use your hands and mash the bag each day.
7. Day 6: Stir in 1 cup flour, 1 cup sugar, and 1 cup milk.
8. Days 7-9: If your starter is in a bowl, stir the starter with a spoon once a day from days two through five. If your friendship bread starter is in a Ziploc bag, simply use your hands and mash the bag each day.
9. Day 10:  Pour the mixture into a large, non-reactive bowl and stir in 1 cup flour, 1 cup sugar, and 1 cup milk. Divide the mixture into four 1 cup portions. Keep one portion for baking, one portion to continue the Amish Friendship Bread Starter cycle, and give two portions away to friends. On the bag, write the date of "Day 1."

Tip: If you're not able to use or give away the Amish Friendship Bread Starter immediately, you can freeze the starter. This stops the yeast from growing and multiplying. When you're ready to use it or gift it, simply take it out of the freezer a few hours before use and allow it to come to room temperature.

Finished Amish Friendship Bread Starter - Little Wooden ChefAmish Friendship Bread Starter Recipe - Little Wooden Chef

Chocolate Amish Friendship Bread

Ingredients:
1 cup Amish Friendship Bread Starter
1 large (5.9oz) package chocolate instant pudding, or two small (3oz) chocolate instant pudding
2 cups all-purpose flour
1 cup white sugar
1.5 tsp baking powder
0.5 tsp baking soda
1.5 tsp ground cinnamon
1 tsp salt
1 cup vegetable oil
0.5 cup milk
3 eggs
1.5 tsp vanilla extract
0.5 cup mini chocolate chips

1. Preheat oven to 350 degrees.

2. In a large, non-reactive bowl, mix together: instant pudding, flour, sugar, baking powder, baking soda, ground cinnamon, and salt.

3. Make a well in the center of the dry mixture and add the liquid ingredients: Amish Friendship Bread Starter, vegetable oil, milk, eggs, and vanilla extract. Mix well. Add the chocolate chips and incorporate it into the mixture.

Amish Friendship Bread Ingredients - Little Wooden ChefChocolate Amish Friendship Bread - Little Wooden Chef

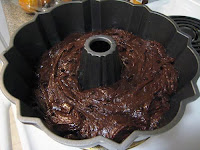
4. Lightly grease two 9x5 inch loaf pans. You can also use a bundt pan, as I did in this example. If you use a bundt pan or a large cake pan, you may need to adjust the cooking time. Pour your mixture into the pan.

Chocolate Amish Friendship Bread Recipe - Little Wooden Chef

5. Bake in preheated oven until a toothpick inserted in the center of the bread comes out clean (around 60 minutes for two loaf pans, and around 70 minutes for a bundt pan). Take the finished Amish Friendship Bread out of the oven and cool for 10 minutes before removing it from the pan.


 6. Enjoy!


0 comments:

Saturday, December 8, 2012

Recipe: Quick & Easy Creamy Italian Sausage and Broccoli Fusilli Pasta

Creamy Italian Sausage and Broccoli Fusilli Pasta Recipe - Little Wooden Chef
Quick and Easy Creamy Italian Sausage and Broccoli Fusilli Pasta:

One of my favorite quick and easy recipes to make after a long and stressful day at work is a Creamy Italian Sausage and Broccoli Fusilli Pasta. If you like creamy pasta, you'll love this easy recipe! My least favorite part of cooking a meal is the prep work involved, and this recipe involves minimal prep work! Of course, it would be very easy to turn this into a 20-step, 15 ingredient recipe, but why make it more difficult than it has to be, when the end result is already so mouth-wateringly delicious?

Creamy Italian Sausage and Broccoli Fusilli Pasta

(an original Little Wooden Chef creation)

Nearly all the ingredients in this recipe are store bought. Like I said earlier, you can hand make any of these ingredients if you desire. As is, this usually takes me about 20 minutes to make, from start to finish.

What you'll need:
1 lb Italian sausage (hot Italian sausage is delicious if you enjoy spicy foods!)
1 jar (24 oz.) garlic alfredo cream sauce
2 tbsp Minced garlic
12 oz fusilli pasta
1 small head of broccoli, chopped
Crushed red pepper flakes, to taste
Salt and pepper, to taste

1. Pre-heat a pan on the stove. When the pan is warm (check by placing your palm a few inches from the surface of the pan), lightly grease the pan with oil, put in the garlic, and break up the sausage in the pan.

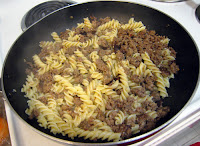
Meanwhile, bring a large pot of water to a boil. As you can see in my example below, I used a large pan/wok for this step. This actually works quite well, and it eliminates one pot from cleanup duties later! As the water is nearing boil, put about a tablespoon of salt in the water. This is the only opportunity you'll have to flavor the pasta itself. Once the water is boiling, put in the fusilli pasta.

Ingredients for Creamy Italian Sausage Pasta RecipeHow to Cook Pasta with Alfredo Cream Sauce and Italian Sausage - Little Wooden Chef

 2. As the sausage is cooking, lightly sprinkle salt, pepper, and crushed red pepper on the meat. If you don't like spicy food, you can omit the crushed red pepper. Alternatively, if you love spicy food and opted to also use hot Italian sausage, be careful not to put too much crushed red pepper in! You can always add more later. Once the sausage is fully cooked, remove it from the pan.

How to Cook Sausage - Little Wooden Chef

3.  Check the firmness of our pasta around the 6-8 minute mark. We want to remove the pasta from the boiling water right before it reaches al dente, since we'll be cooking it more in the next step. We don't want the pasta to be overcooked by the time we reach the end of the cooking process. Reserve one cup of the pasta water for the next step. The salted pasta water will help thin the cream slightly and also brings some starchiness to the sauce.

4. Combine the fusilli pasta with the sausage, and mix well.

Step by Step Guide to Making Good, Creamy Pasta - Little Wooden Chef

4.  Add the cream sauce and reserved pasta water to the pan, and stir well to combine. Add salt, pepper, and crushed red pepper flakes to taste. I love using fusilli pasta for this recipe because the curls in the pasta hold sauce so well. Sauce would more easily slide off a straight pasta like a fettuccine or linguine. About three minutes before you're done cooking the pasta, add the broccoli. You don't want to cook the broccoli too long or it'll become a mushy mess. Once the pasta is al dente, you're done!

Quick and Easy Recipe for Pasta with Alfredo Cream Sauce

 5. Plate, and enjoy!


0 comments:

Wednesday, December 5, 2012

Recipe: Lamb and Water Chestnut Potstickers with Black Vinegar Ginger Sauce

Lamb and Water Chestnut Potstickers Recipe - Little Wooden Chef
Lamb and Water Chestnut Potstickers Recipe:

I've made my share of potstickers in the past, but I was recently inspired to try a new recipe: Lamb and Water Chestnut Potstickers with Black Vinegar Ginger sauce. It isn't a traditional Chinese potsticker, but more of a potsticker with an Asian Fusion theme to it. Nonetheless, it was delicious! The prep work takes some time, but it freezes well and makes a quick and easy meal later!

I attended a party a few weeks ago where each guest was asked to bring an appetizer or dessert to share, and the host would make the main dish and provide the cocktails. Usually for a party like this, I try not to get too fancy since it's difficult to transport hot foods, especially when it is for an after-work party with no time to go home and cook first.

Since I set a goal to cook more and try new recipes, I decided that this would be the perfect opportunity to experiment with a recipe inspired by a local Seattle restaurant: Lamb and Water Chestnut Potstickers.

The recipe was hit with everyone at the party! The black vinegar ginger sauce was the perfect accompaniment to the lamb potstickers - it added just the right balance of flavors without being too overpowering.  Try it for yourself, and let me know what you think of the recipe!

Warning: time required to make the potstickers will vary greatly depending on your dumpling folding skills! My dad (more of a titanium chef versus a wooden chef) would be able to fold everything in 10 minutes, whereas it would take me two hours. But - practice makes perfect!

Lamb and Water Chestnut Potstickers with Black Vinegar Ginger Sauce

 (recipe from Ponti Seafood Grill)

For the purposes of these instructions:
Potsticker and Gyoza, to me, are the same thing. The words are interchangeable. They are pan-fried dumplings. 
Dumplings generally have not been pan fried. They can also refer to the result of cooking through boiling or steaming, rather than pan frying. You can use this method of cooking the dumplings instead of pan frying for a healthier alternative.


Lamb and Water Chestnut Potstickers:

1 lb. Ground Lamb
2 small (8oz.) cans Water Chestnuts, Drained Well and Chopped
3 tsp. Brown Sugar
2 Eggs
4 tsp. Fish Sauce
3 Scallions, minced
½ tsp. Black Pepper
1 tsp. Salt
1 pack gyoza wrappers (50 pieces should be plenty)

1. Mix all the ingredients well and refrigerate overnight, covered. This period of refrigeration allows the meat to marinate and absorb all of the flavors.
(It may also be a good idea to make the black vinegar ginger sauce at this point as well, since that also requires a few hours of marination. Recipe below.)


2. The following day, take the marinated lamb out of the refrigerator, along with the gyoza wrappers. Fill a small bowl with water; you'll be using this to seal the gyoza.

3. Put a gyoza wrapper in the palm of your left hand (or right hand if you're left handed) and use a spoon to put a small amount of meat in the middle of the wrapper. If this is your first time folding gyoza, start with less meat and work your way up. At this point, you have two options on how to fold your gyoza: the easy way, or the pretty way.

4. The Easy Way: Dip your finger in the bowl of water and lightly wet the perimeter of half the gyoza wrapper. Take that half of the wrapper and fold across vertically, so that you end up with a semicircle. Press down on the edges. Repeat until you've used up all the meat and/or wrappers. Put the completed dumplings on a plate in a single layer.

5. The Pretty Way: Dip your finger in the bowl of water and lightly wet the perimeter of half the gyoza wrapper. Cup your hand so that the wrapper is sitting in your hand like a taco shell. Take one side and start making pleats, pressing the pleats against the non-folded side as you go. Continue making the pleats until you're able to close the wrapper. Put the completed dumplings on a plate in a single layer.

How to Fold Potstickers - Little Wooden Chef

6. If you're not planning on cooking all the dumplings the same day, leave them on the plate, cover with plastic wrap, and stick it in the freezer. After 1-2 hours, you can remove them from the freezer and throw them in a plastic bag or Ziploc bag for long-term storage. The initial freezing period helps prevent the dumplings from all sticking together.

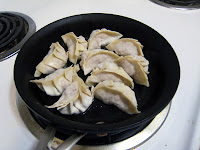
7. When you're ready to cook the potstickers, pre-heat a frying pan over medium-high heat. When the pan is ready, you should feel some heat emitting from it if you put your hand a few inches from the surface. Pour three tablespoons of vegetable oil into the pan and swirl it around the pan so the entire surface is coated. Put the dumplings into the pan one at a time, making sure the pleated or folded side is facing up. You want the nice, crispy side to be on the bottom, not on the sides!
(It doesn't matter if the dumplings are frozen or thawed at this point. The ones I'm using in this example are straight out of the freezer.)

How to Cook Potstickers - Little Wooden Chef

7. Pour half a cup of boiling water in the frying pan, and cover the pan with a lid. Let it cook for 8-10 minutes. This step steams/boils the top half of the potsticker. The lamb will turn a pinkish color as it cooks, and the skin will become slightly more translucent.

How to Steam and Pan Fry Potstickers - Little Wooden Chef

8. Take the lid off the pan and let the water evaporate through the cooking process. Once all the water evaporates, you'll be left with just the vegetable oil. At that point, the second part of the cooking process will begin: the pan-frying! Let it pan fry for 3-5 minutes, or until the bottom of the potstickers are crispy and a nice shade of brown.

Lamb and Water Chestnut Potstickers - Pan Frying - Little Wooden Chef

9. Carefully remove the potstickers from the pan, and serve with the Black Vinegar Ginger Dipping Sauce (recipe below). Enjoy!

Lamb and Water Chestnut Potstickers with Black Vinegar Ginger Sauce - Little Wooden Chef


Black Vinegar-Ginger Dipping Sauce:

¼ cup    Soy Sauce
¼ cup    Sake
¼ cup    Chinese Black Vinegar
2 Tbsp   Scallion, minced
4tsp       Ginger, microplaned
1 Tbsp   Garlic, minced
1 Tbsp   Brown Sugar
1 tsp      Chile-Garlic Paste

Mix all ingredients in a bowl, and refrigerate for a few hours to allow the flavors to marinate and blend together. Serve alongside the Lamb and Water Chestnut Potstickers.

0 comments:

Friday, November 30, 2012

Dreaming of Parisian Macarons

Parisian Macarons - Little Wooden ChefParisian Macarons - Little Wooden Chef

Lately, I've become obsessed with Parisian Macarons - those delicate, light, fluffy cookies made only the more visually appealing by its beautiful colors and simple composition. I don't know what spurred on this sudden urge to try making macarons, but it's stayed with me this entire week. I've even gone as far as to buy a food processor, a food scale, and some piping bags to prepare myself for this culinary adventure!

As a plus, for those who follow a gluten-free diet, macarons are naturally made using almond flour, which are simply blanched, finely ground almonds. No gluten in these recipes! I didn't even know almond flour existed until this past week, but apparently it can be used in all sorts of desserts in lieu of normal flour. I don't follow a gluten-free diet, but it still sounds delicious to me! I love almonds.

Apparently, macarons are really difficult to master. You need to mix it just so, fold it just so, bake it just so, and a mistake in any step of the process will cause the macarons to not rise properly and form the delicate "feet" at the base of the cookie.

This will be an interesting experiment in the kitchen! I'm excited though, and hopefully they turn out well enough to gift as holiday presents! Wouldn't that be beautiful? A few colorful macarons stacked inside a plastic gift bag, tied up by a bright ribbon and accentuated by a beautiful holiday-themed gift tag.

0 comments:

Sunday, November 25, 2012

Recipe: Taiwanese Braised Pork on Rice (滷肉飯 / Ru Lou Fan)

Taiwanese Braised Pork on Rice - Little Wooden Chef
Taiwanese Braised Pork on Rice Recipe (滷肉飯)

I had a craving for Ru Lou Fan (滷肉飯) a few weeks ago, so I decided to try my hand at making this seemingly simple and delicious comfort food. Ru Lou Fan is a Taiwanese braised pork rice dish that can be found at many Taiwanese restaurants. It's a very simple dish consisting of just pork belly, rice, and some garnish (like pickled radishes or braised eggs). If you want to learn how to make Taiwanese Braised Pork on Rice, follow the step by step instructions below.
read more

1 comments:

Tuesday, November 13, 2012

Early Present: Shun Chef's Knife!


One of my biggest annoyances of cooking for the past few years has been that my knife is absolutely horrible, and dulls quickly. I replaced my old knife two years ago and got a Calphalon knife that was great when it was new. After many months of use, it started to dull and I bought a sharpening steel for it. It helped slightly, but not enough to stop my frustration.

A few days ago, I spotted a Gold Box "Lightning Deal" on Amazon.com for a 7" Shun Classic Chef's Knife. My eyes lit up!
read more

0 comments:

Sunday, November 11, 2012

How To Guide: Toasted Sesame and Honey Gelato

Toasted Sesame and Honey Gelato - Little Wooden Chef
Toasted Sesame and Honey Gelato

I finished making my Toasted Sesame and Honey Gelato a few days ago, but just haven't found the time to put it up onto my blog until now. I promise I'm not failing my goal of posting a recipe every two weeks...yet! Yum, Gelato!

I followed a recipe from the book "Making Artisan Gelato" by Torrance Kopher. This book has a good mix of history, technique, and recipes. I actually read through this cookbook front to back, which is typically not something I do with cookbooks! With gelato, it's all about the perfect ratio of ingredients. I've tried a few recipes from this cookbook and they've all turned out amazing. I've tried some online recipes from different websites and they were always too icy at the end, because there was too much liquid ingredients and not enough fat and sugar to counteract.
read more

0 comments:

Saturday, November 10, 2012

Masters of Trade


I was bored this morning, browsing through Netflix trying to find something to watch, and I came across a movie that caught my eye: "Jiro Dreams of Sushi." The short summary read:

"This delectable documentary profiles sushi chef Jiro Ono, an 85-year-old master whose 10-seat, $300-a-plate restaurant is legendary among Tokyo foodies. Ono is also a father, whose sons struggle to live up to his legacy and make their own marks."

I love sushi, so the words "legendary" and "$300-a-plate restaurant" caught my eye. I wasn't really in the mood for a documentary though, so I scrolled on by. But it stuck in my mind, and I pulled out my phone and did a quick search on it to see if it'd be worth my time. It got overwhelmingly positive reviews, with four and five star ratings. More interestingly, one of Jiro's apprentices started his own restaurant right in my hometown of Seattle! Okay, I'll bite the bullet and watch.

read more

0 comments:

Saturday, November 3, 2012

A Love of Gelato


Gelato, oh how I love you so! You're so light, creamy, and full of flavor. Why did you wait so long to come into my life?

For those of you who may not know, gelato is Italy's version of ice cream. I will emphasize, however, that it is not ice cream. There are some significant differences between the two.

For the health- or diet-conscious, gelato typically contains half the amount of butterfat as ice cream, which can lead one to assume it has less saturated fat than ice cream. However, the flavor is still intense due to less air being whipped into gelato versus its counterpart. This makes gelato denser, but more flavorful, than a similar sized scoop of ice cream.

I first fell in love with gelato during a backpacking trip through western Europe a few years ago. After walking around in the sweltering 95-degree heat all day, I was looking for anything that would cool me down! Gelato was the answer.

read more

0 comments:

Wednesday, October 31, 2012

The Beginning

Dilbert Cooking Cartoon Comic

I love to write, I love photography, and I want to learn to cook. While in the shower today, I decided I wanted to start a blog and start writing and posting pictures of all the dishes I cook, along with their recipes. I thought about making this a new year's resolution, but why wait? Every minute that passes by is another minute wasted. So, here's to the beginning of Little Wooden Chef's culinary adventures!
read more

0 comments:

Blogger Template by Clairvo